SendSweep — User Manual
This manual explains how to use the SendSweep app features shown in the provided screenshots: Messages, Bulk Send, Campaigns, Pipelines, Integrations, Virtual Business Card, Blacklist, Power Dialer, Analytics, Message Templates, and Settings (Theme).
Getting Started
SendSweep uses a bottom navigation bar to move between your core workflows. From left to right: Messages, Bulk Send, Campaigns, Pipelines, and More.
- MessagesYour conversation inbox. Search, open threads, and manage chats.
- Bulk SendLoad recipients and send an SMS/MMS or email blast with controls.
- CampaignsCreate recipient groups for repeat outreach and importing.
- PipelinesTrack leads as opportunities with stages, value, and follow-up actions.
- MoreTools & settings: integrations, blacklist, dialer, analytics, templates, theme.
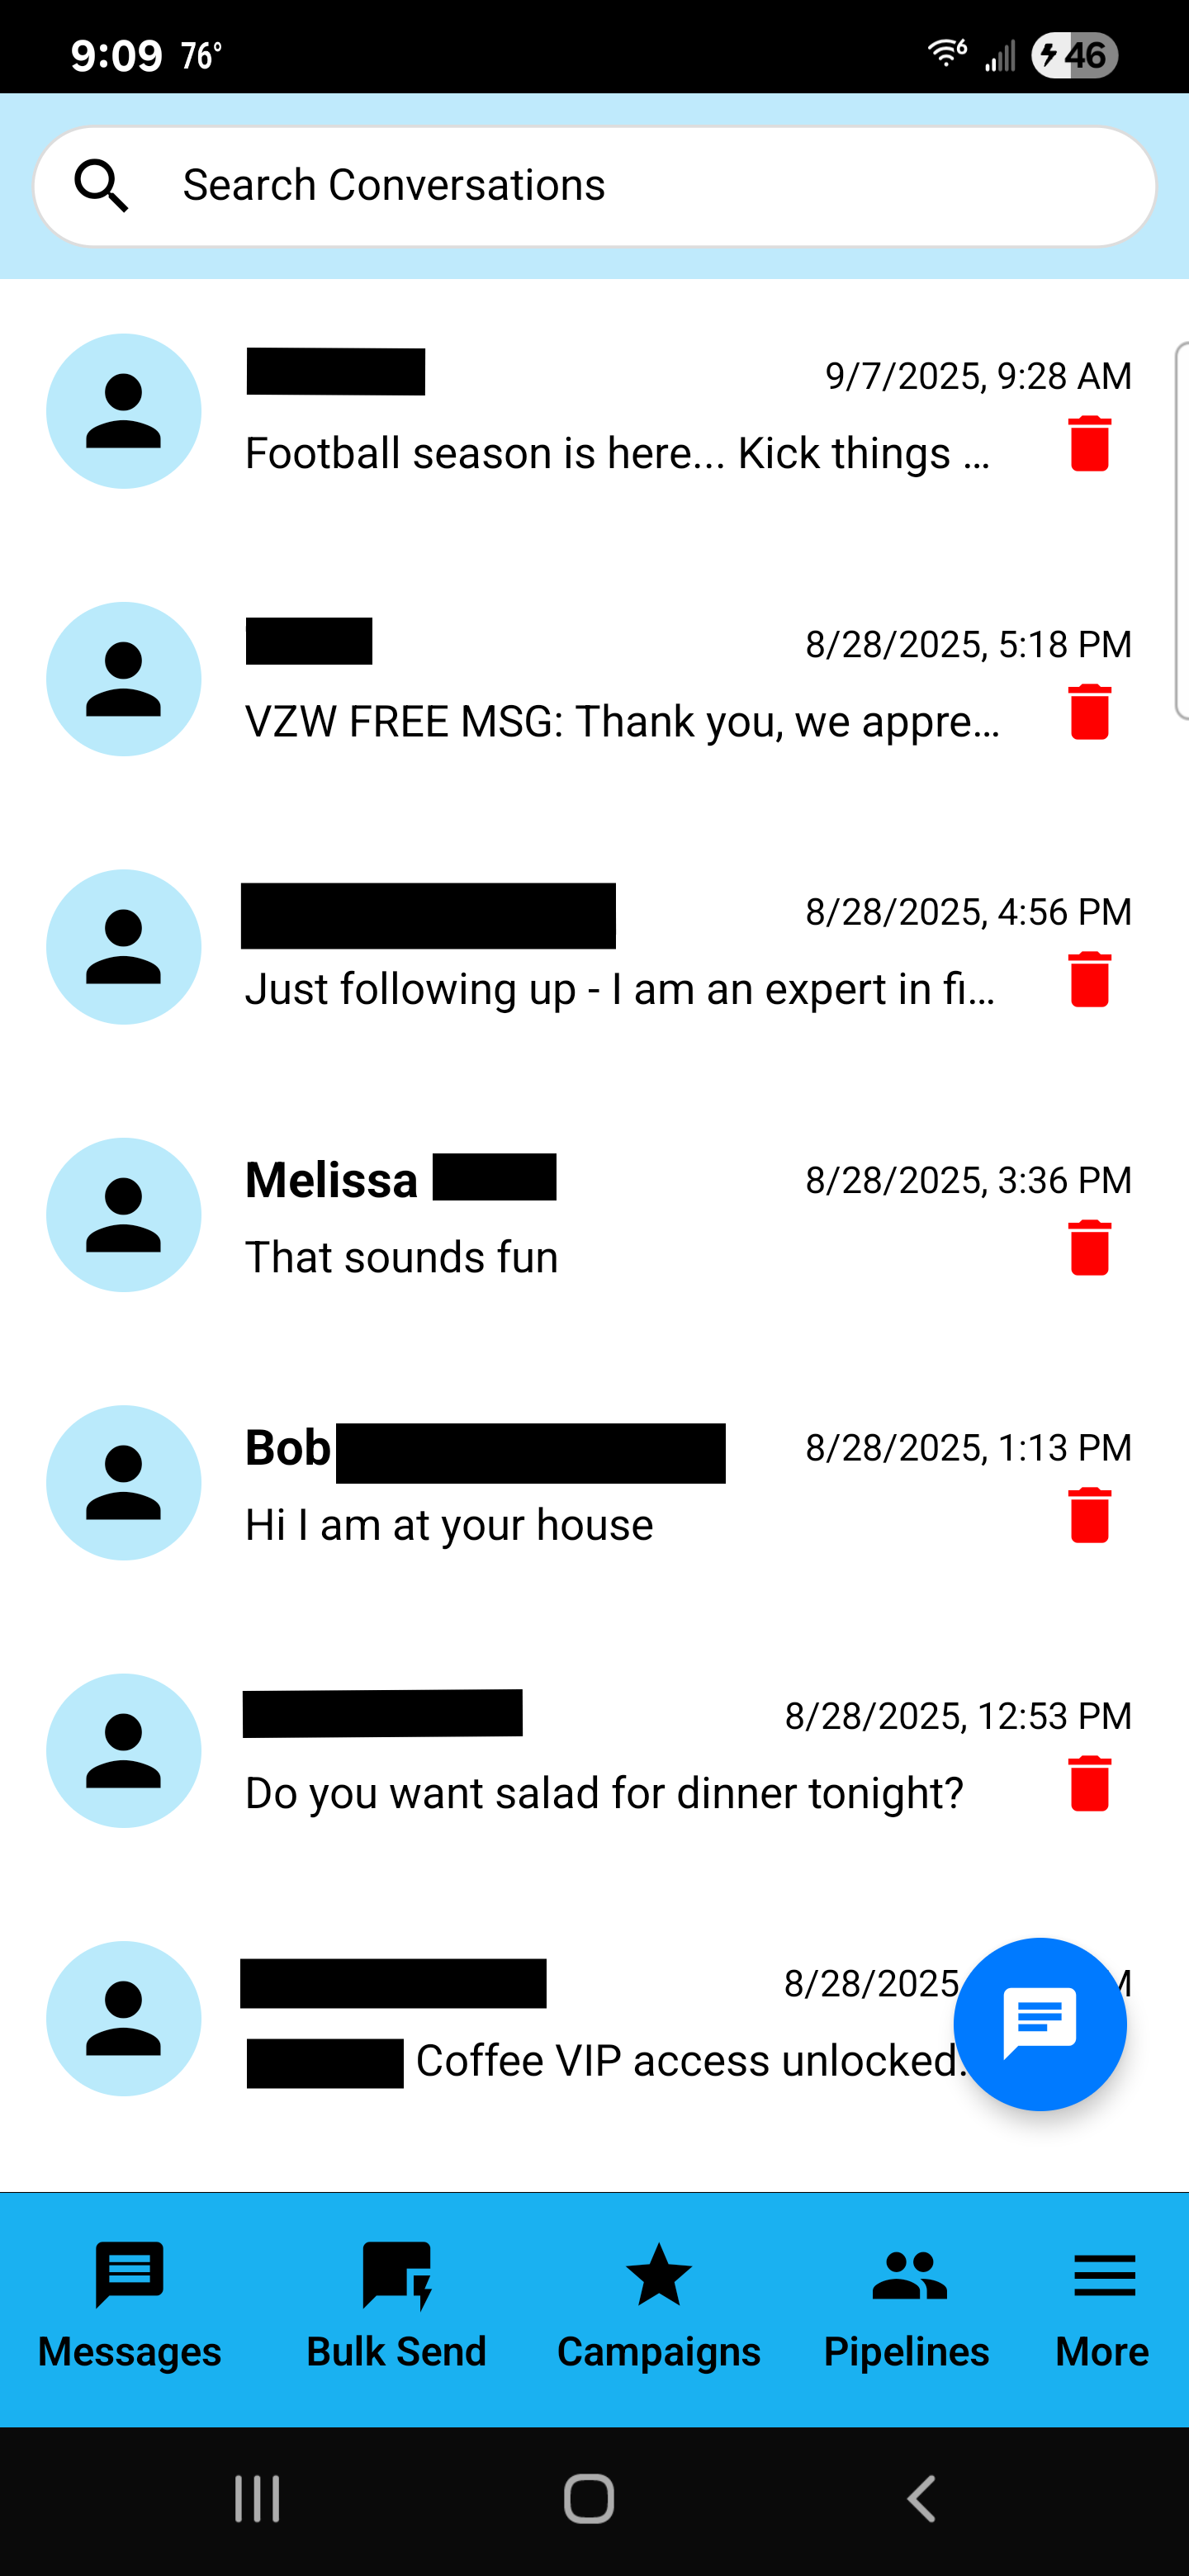
Messages
The Messages screen is your inbox-style view of conversations. Each row shows a contact (or number), a preview of the latest message, and a timestamp.
Common actions
- Search conversations: Use the top search bar to find a conversation by name or number.
- Open a conversation: Tap a conversation row to open the thread.
- Delete a conversation: Tap the red trash icon on the right side of the row.
- Compose: Tap the blue floating message button (bottom-right) to start a new message.
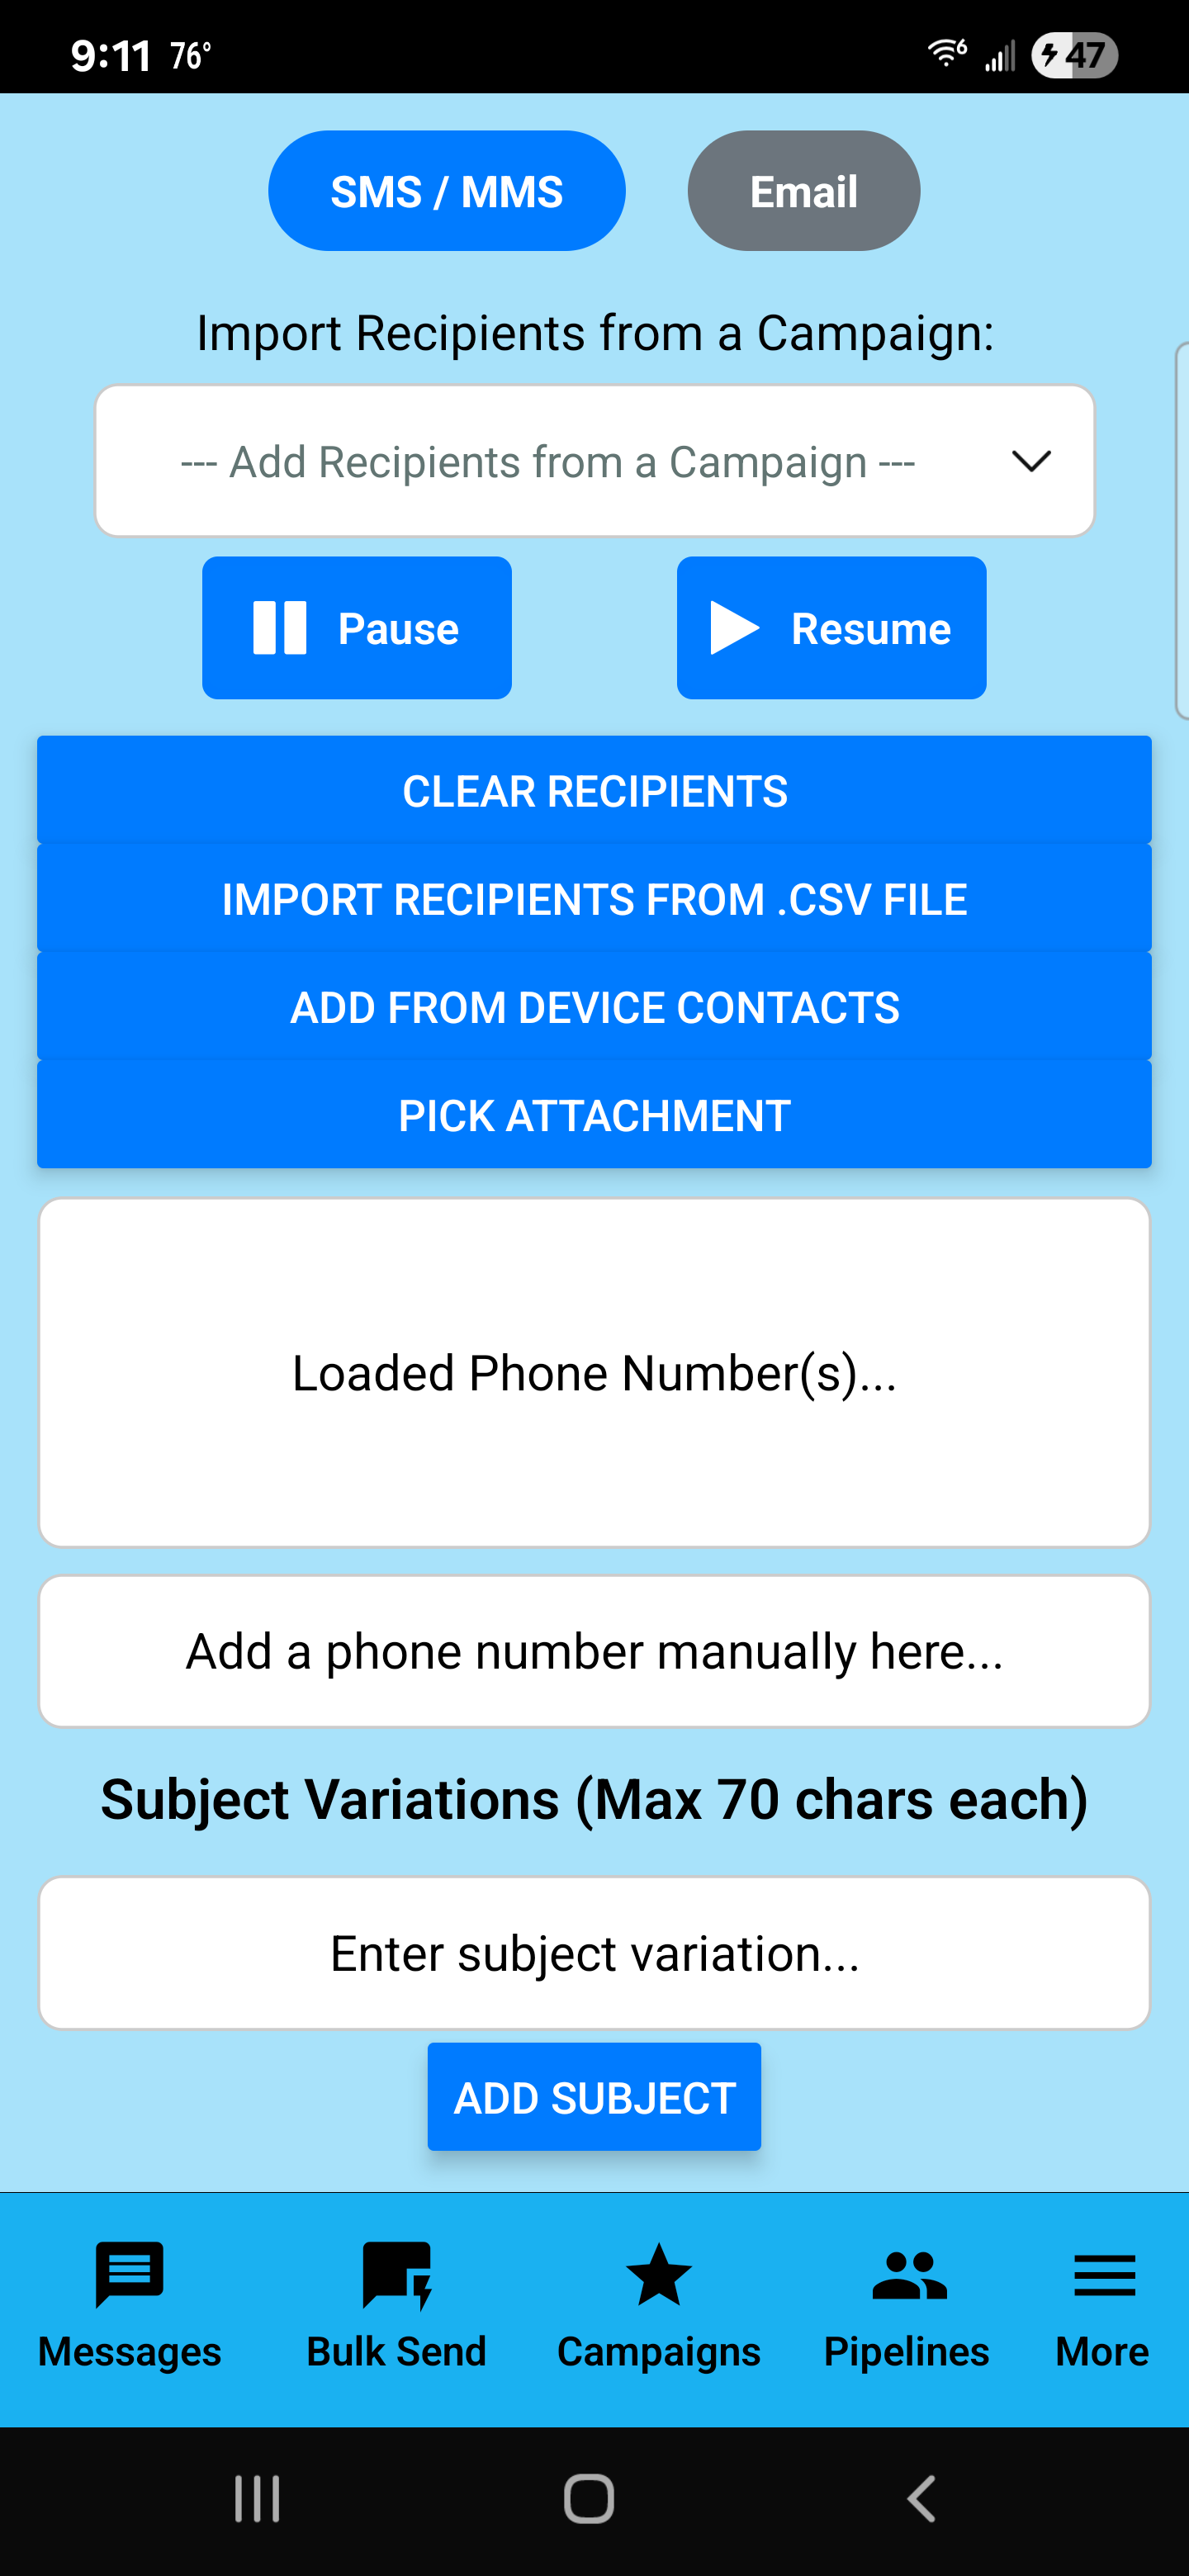
Bulk Send (SMS/MMS & Email)
The Bulk Send page is designed for sending the same message (or controlled variations) to many recipients. This is where you load numbers, attach media, and control sending.
Choose your sending mode
- SMS / MMS: Send text messages, optionally with attachments (MMS).
- Email: Switch to email mode to deliver flyers or longer content via email.
Load recipients (multiple ways)
- Import from a Campaign: Select a campaign in the dropdown to load recipients.
- Import from a CSV: Use IMPORT RECIPIENTS FROM .CSV FILE.
- Add from device contacts: Use ADD FROM DEVICE CONTACTS.
- Manual entry: Type a number or paste multiple numbers separated by commas.
Attachments (for MMS)
- Tap PICK ATTACHMENT to add an image, video, PDF, or audio (depending on your app setup).
Pause / Resume
Use Pause to stop sending temporarily and Resume to continue. This is useful if you need to review your list or adjust content before continuing.
Subject Variations
Add subject variations (up to 70 characters each). This is especially useful for email mode or structured outreach.
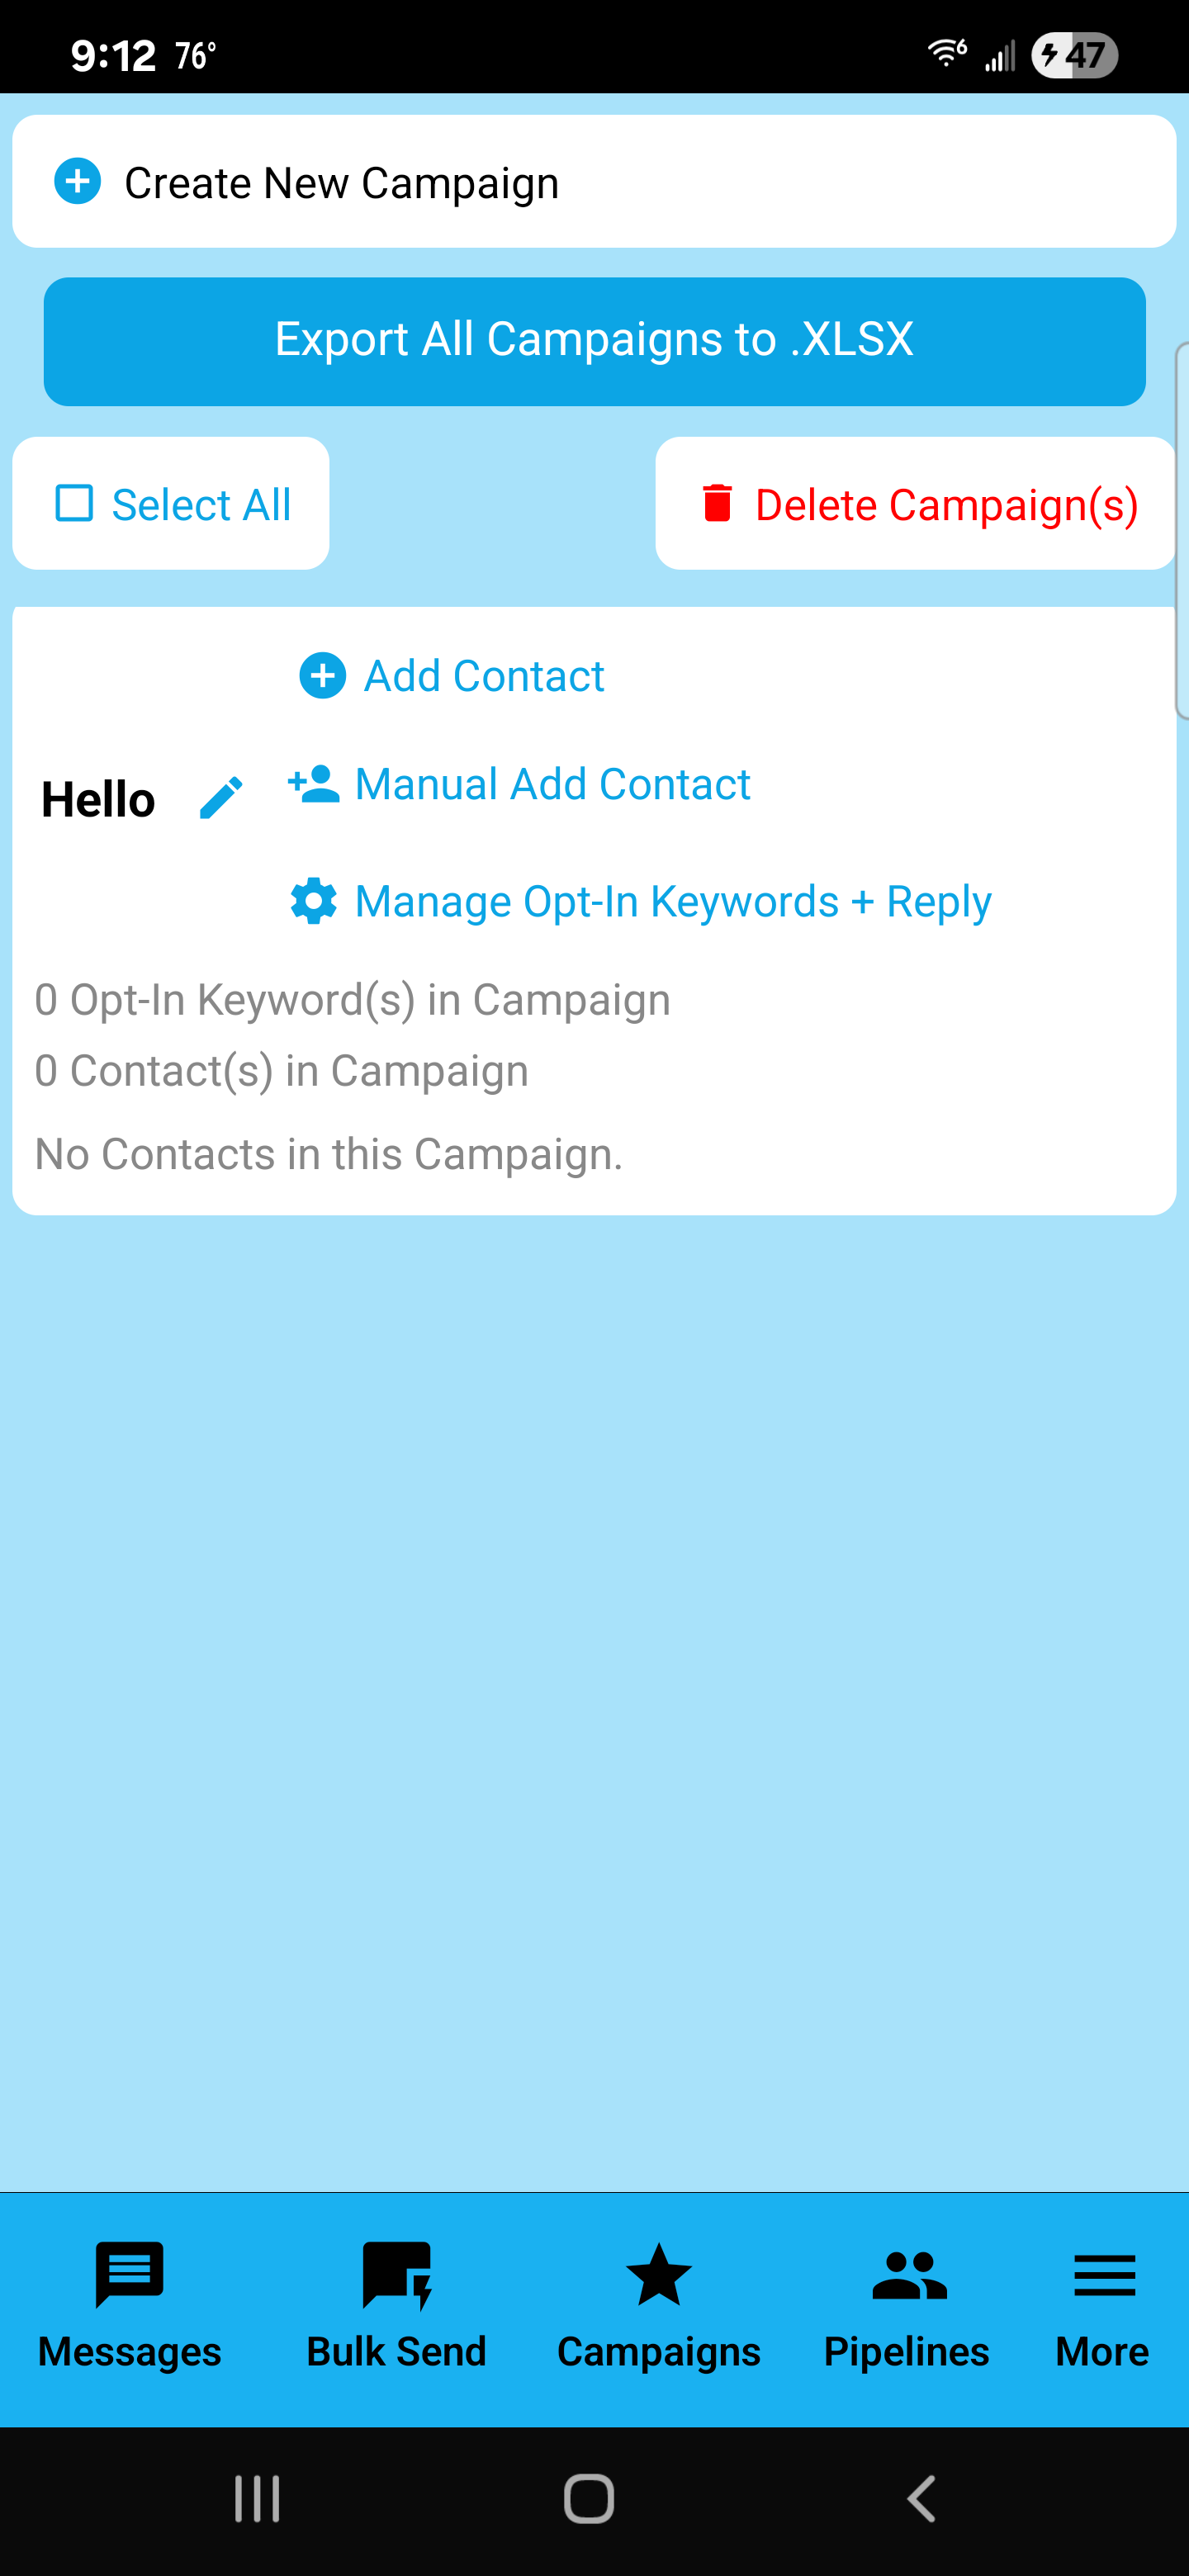
Campaigns
Campaigns are organized recipient groups. Create a campaign per niche, location, or lead source, then repeatedly load it inside Bulk Send or Power Dialer.
Create a campaign
- Tap Create New Campaign.
- Name it clearly (examples: “Industrial Park”, “HVAC Leads”, “Real Estate Agents”).
- Open it and start adding contacts.
Add contacts to a campaign
- Manual add: Use Manual Add Contact.
- Opt-in keywords + reply: Manage an opt-in keyword flow (people text a keyword to join your list).
Export campaigns
Use Export All Campaigns to .XLSX for backups, spreadsheet cleanup, or sharing.
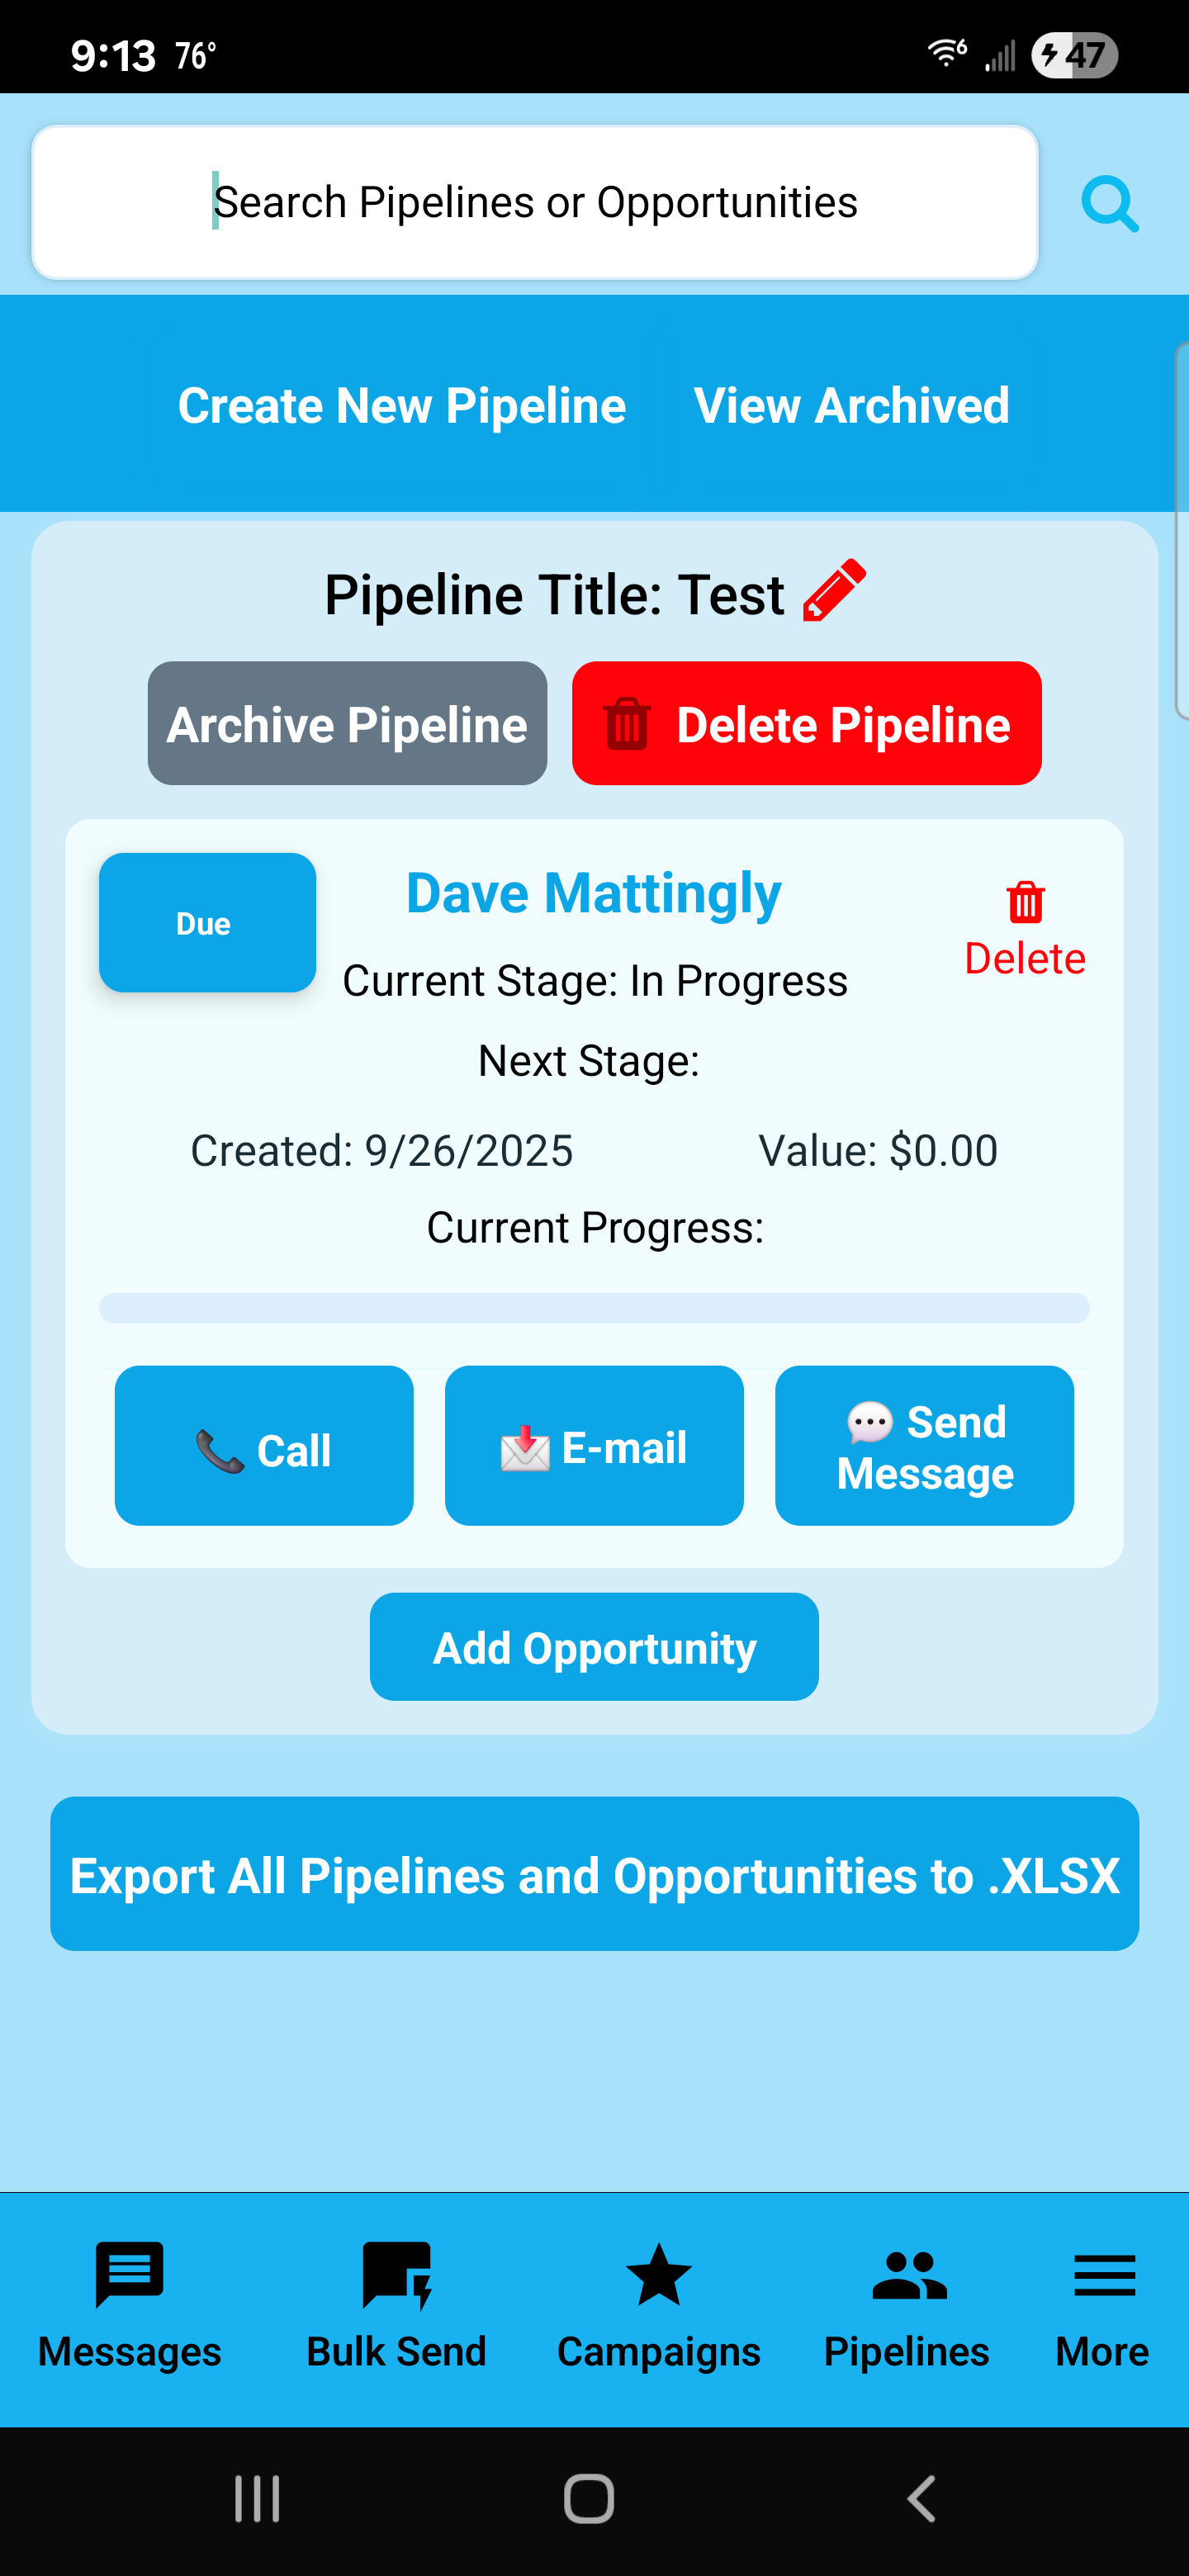
Pipelines
Pipelines are your lightweight CRM. Track opportunities from first contact to closing with stages, value, progress, and follow-up actions.
Pipeline controls
- Create New Pipeline creates a new process.
- View Archived shows pipelines you’ve archived.
- Archive Pipeline hides it from active view (without deleting).
- Delete Pipeline permanently removes it.
Opportunity cards
- Current Stage / Next Stage: where the lead stands and what’s next.
- Created date: how long this has been in your pipeline.
- Value: your expected revenue from this lead.
- Progress bar: quick status visualization.
Quick actions
- Call, E-mail, and Send Message help you take immediate action on a lead.
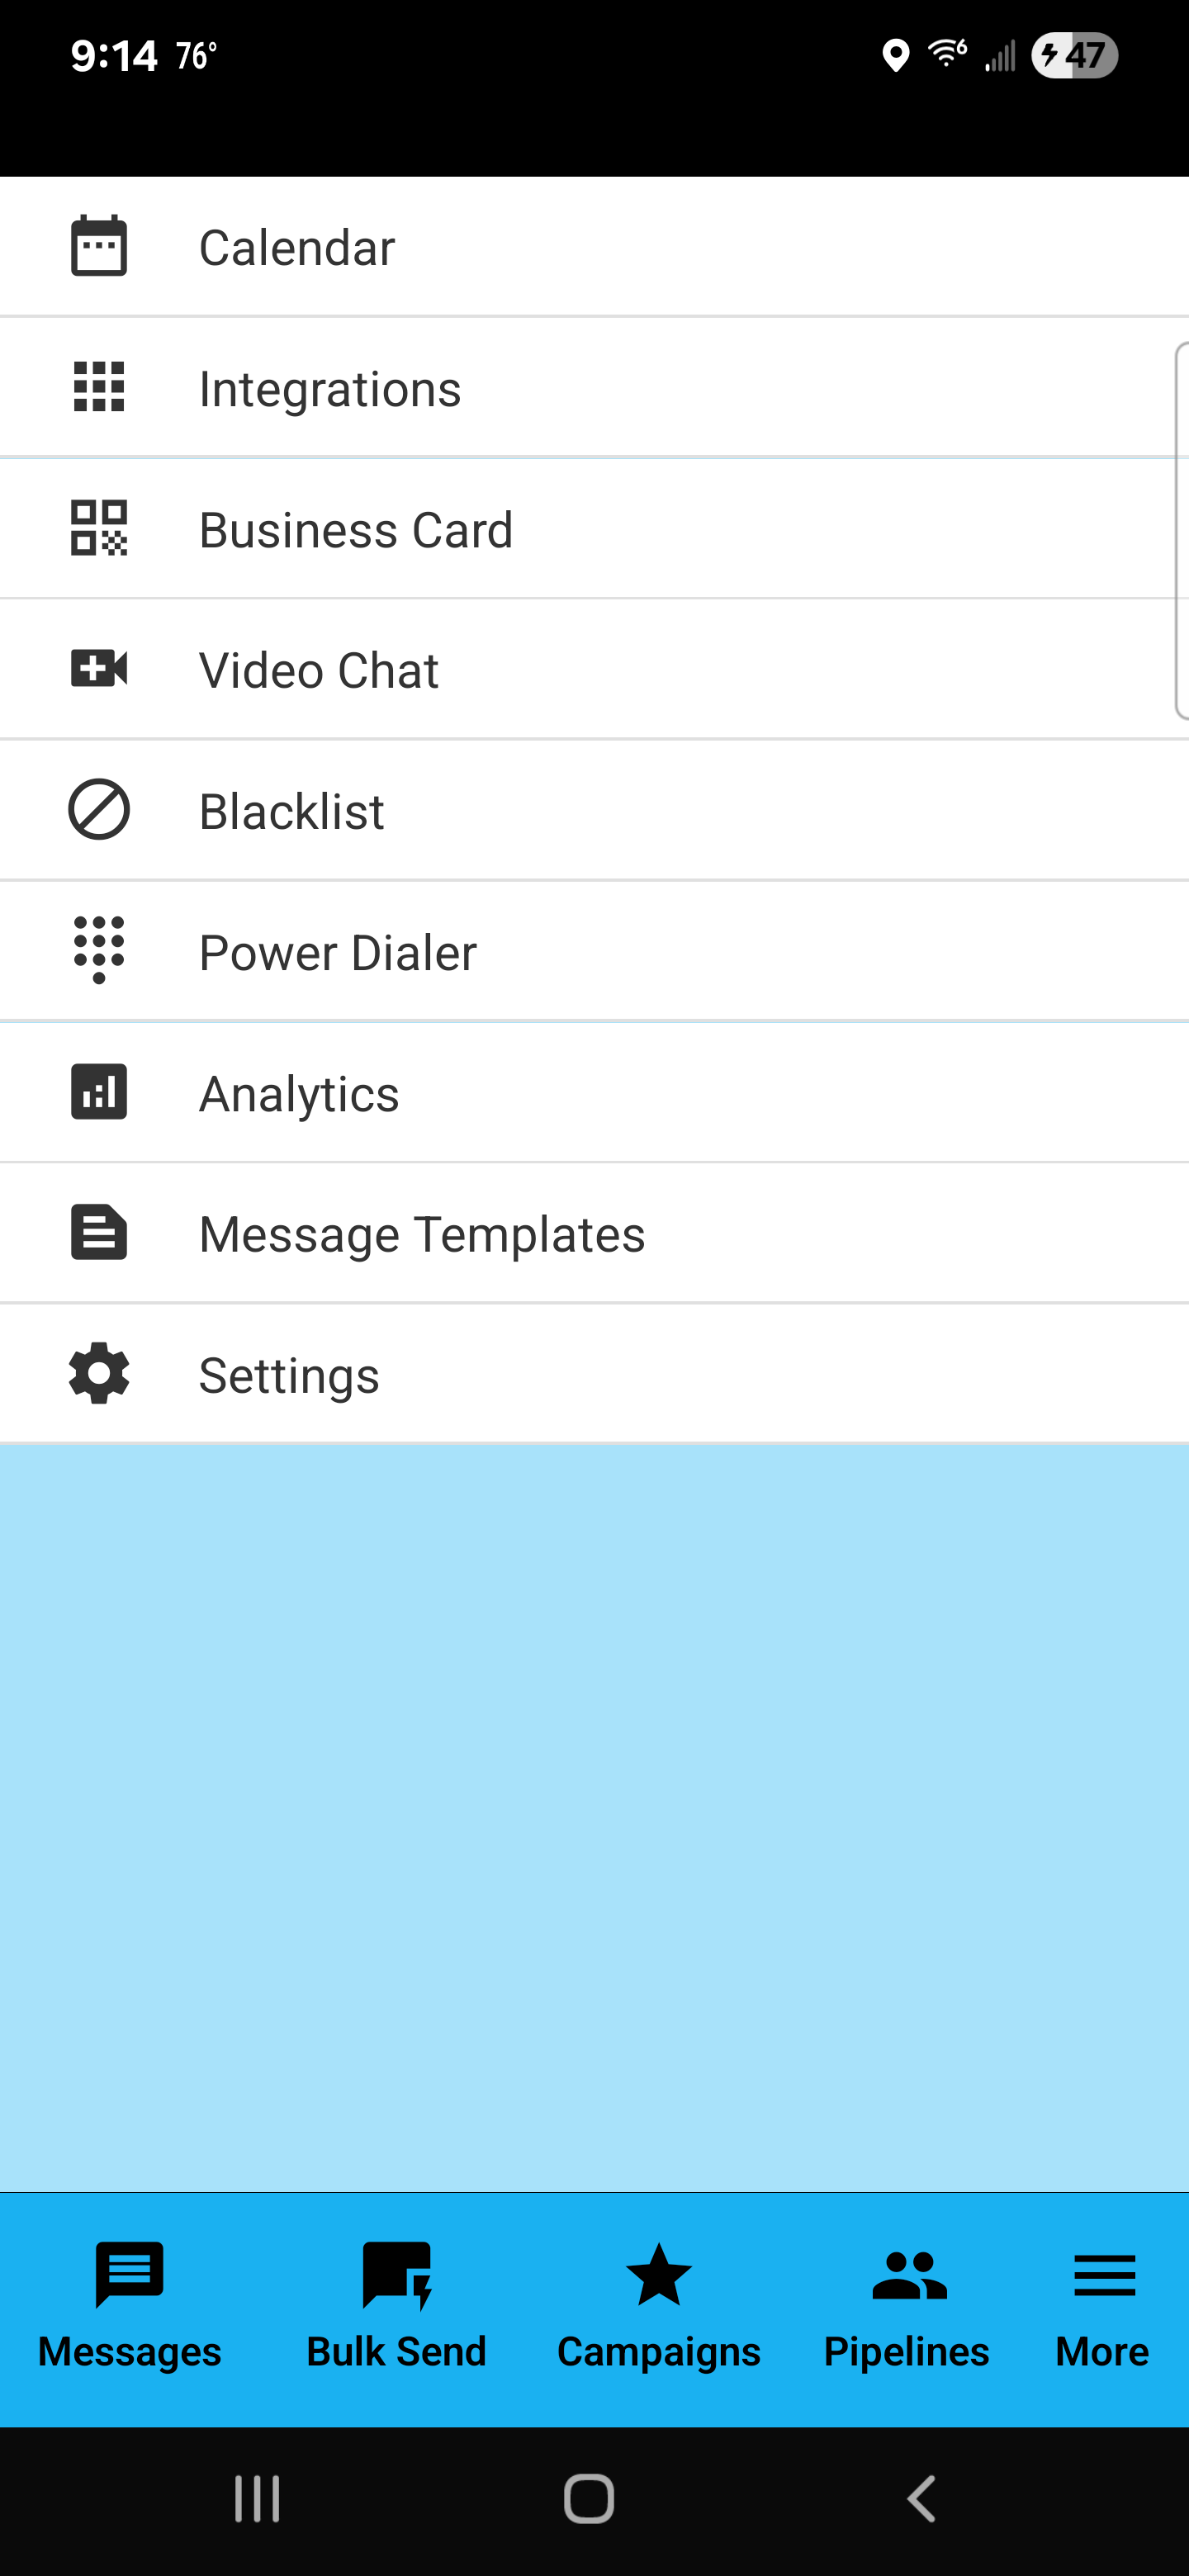
More Menu
The More menu is the hub for tools and settings beyond the main tabs. This includes integrations, blacklist controls, power dialer, analytics, message templates, and settings.
Menu items explained
- Calendar: Scheduling-related tools.
- Integrations: Connect Google/Microsoft productivity platforms.
- Business Card: Share your contact via QR code.
- Video Chat: Video chat feature (when used/configured).
- Blacklist: Opt-out keywords and blocked entries management.
- Power Dialer: Call through a list with drip delay.
- Analytics: Overview counts for sending and tracking.
- Message Templates: Save reusable messages for faster sending.
- Settings: App preferences, including theme changes.
Integrations
Integrations let you connect SendSweep to productivity platforms so you can move campaign/pipeline data to spreadsheets, documents, storage, and calendars.
Search + Favorites
- Search: Use the search box to locate a specific integration quickly.
- Star (Favorite): Tap the star to favorite an integration for faster access later.
Typical workflows
- Sheets / Excel Online: Clean lists, dedupe, and re-import as CSV.
- Drive / OneDrive: Store flyers, exports, and PDF material.
- Calendar: Track follow-ups tied to pipeline opportunities.

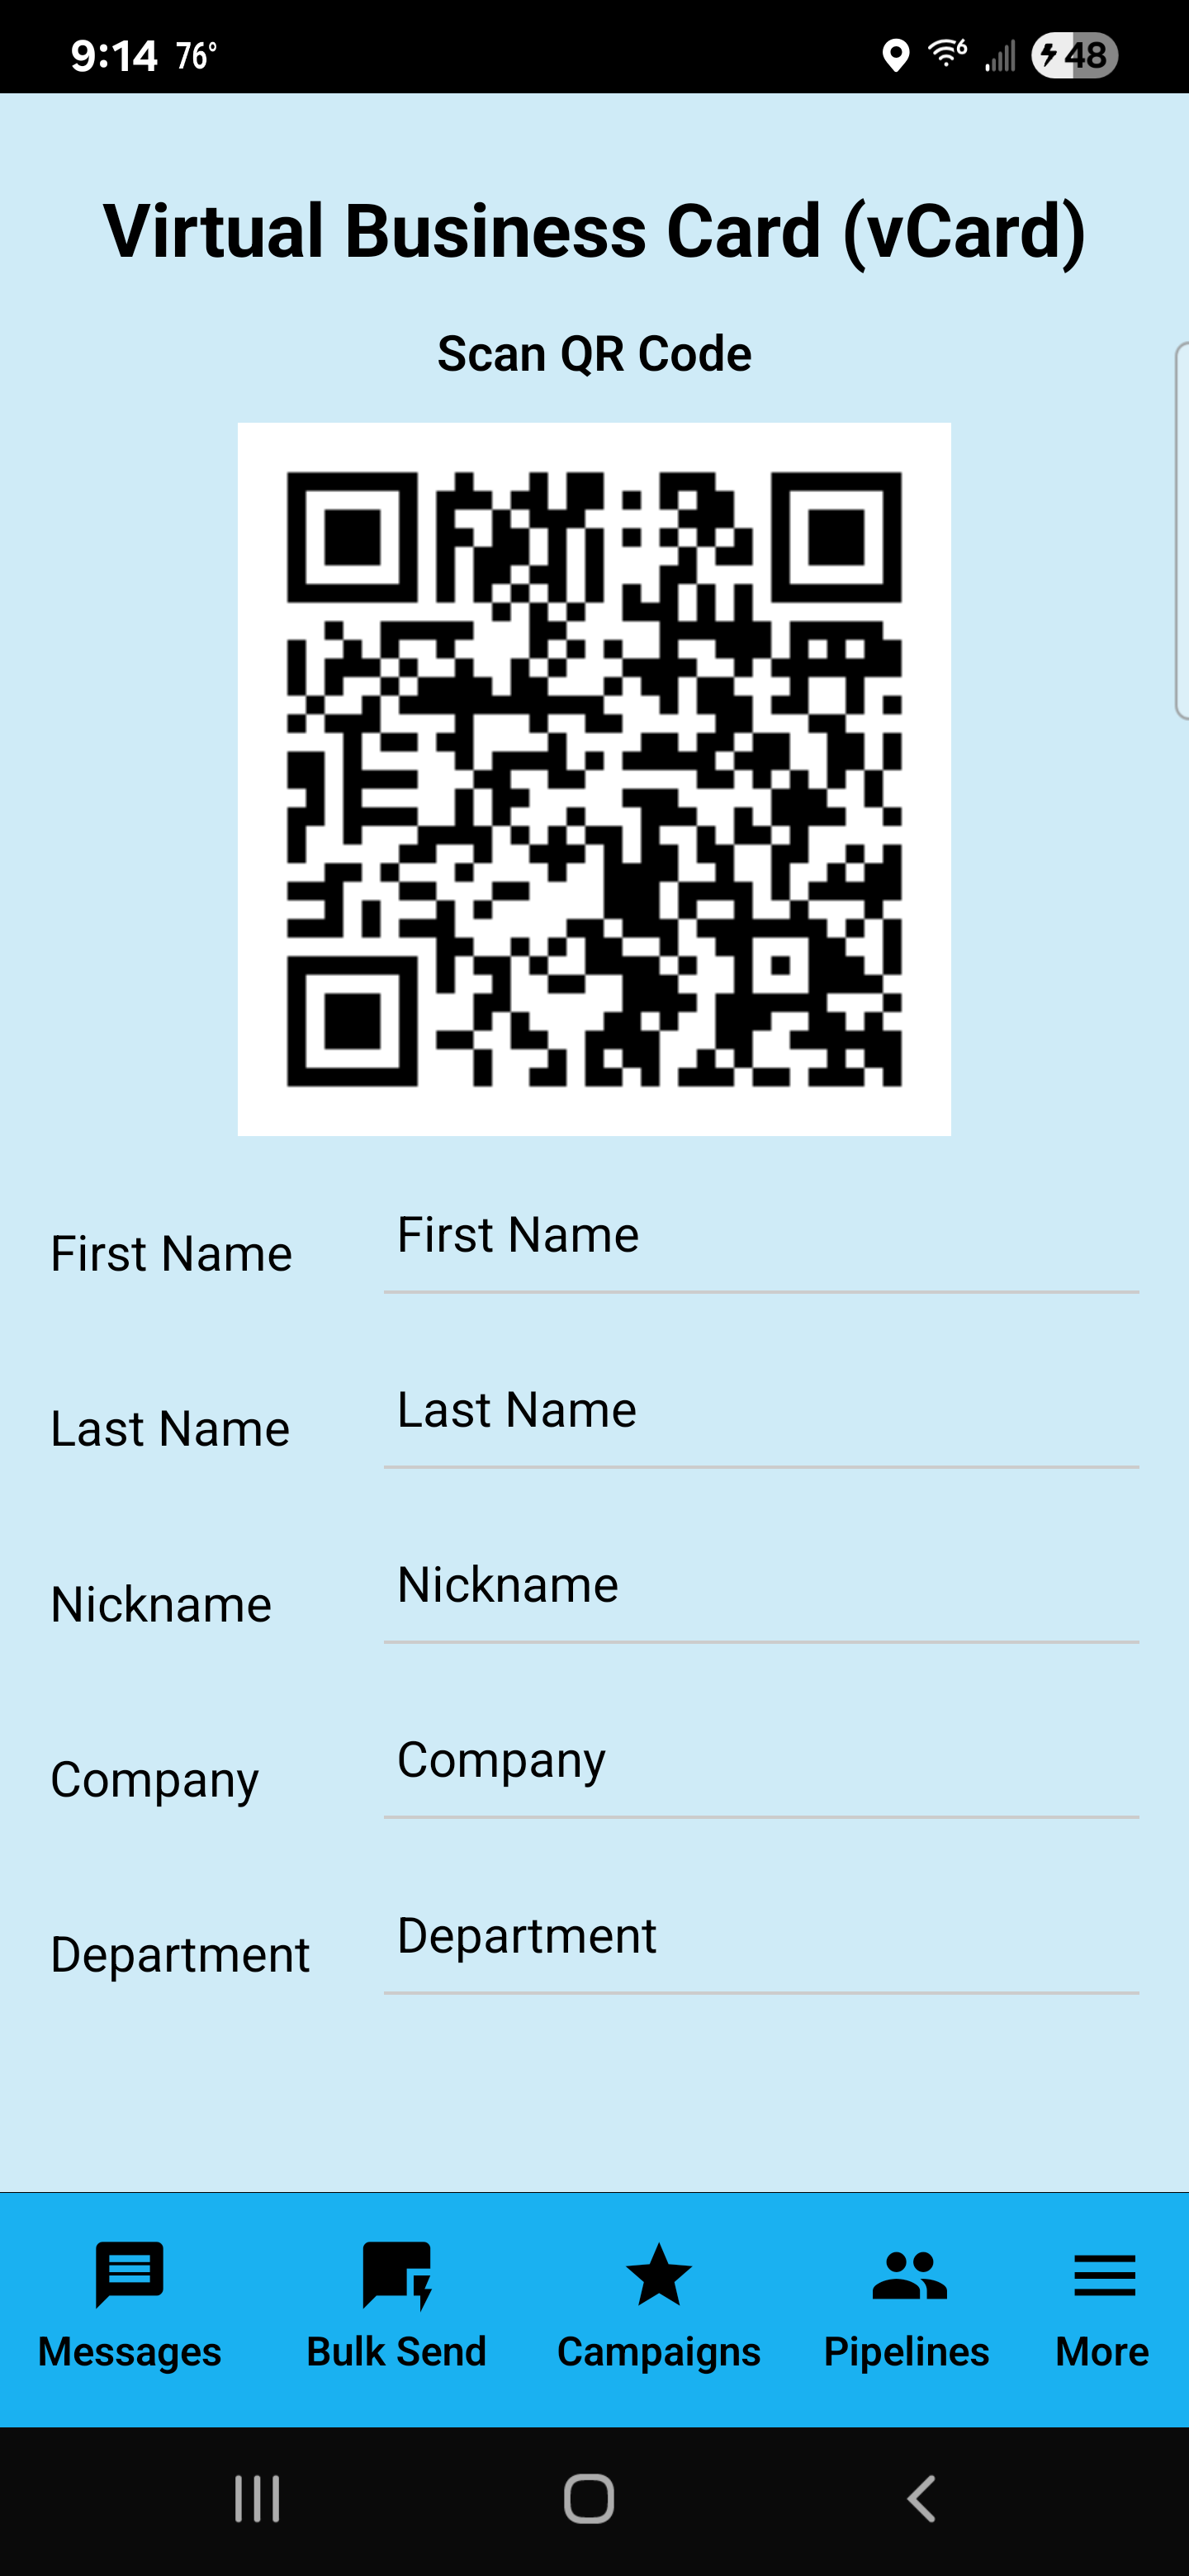
Virtual Business Card (vCard)
Virtual Business Card lets you share your contact details via a scannable QR code.
Fill in your details
- First Name / Last Name
- Nickname (optional)
- Company
- Department
Share the QR code
- Open the vCard screen.
- Have someone scan the QR code.
- They save your contact information.
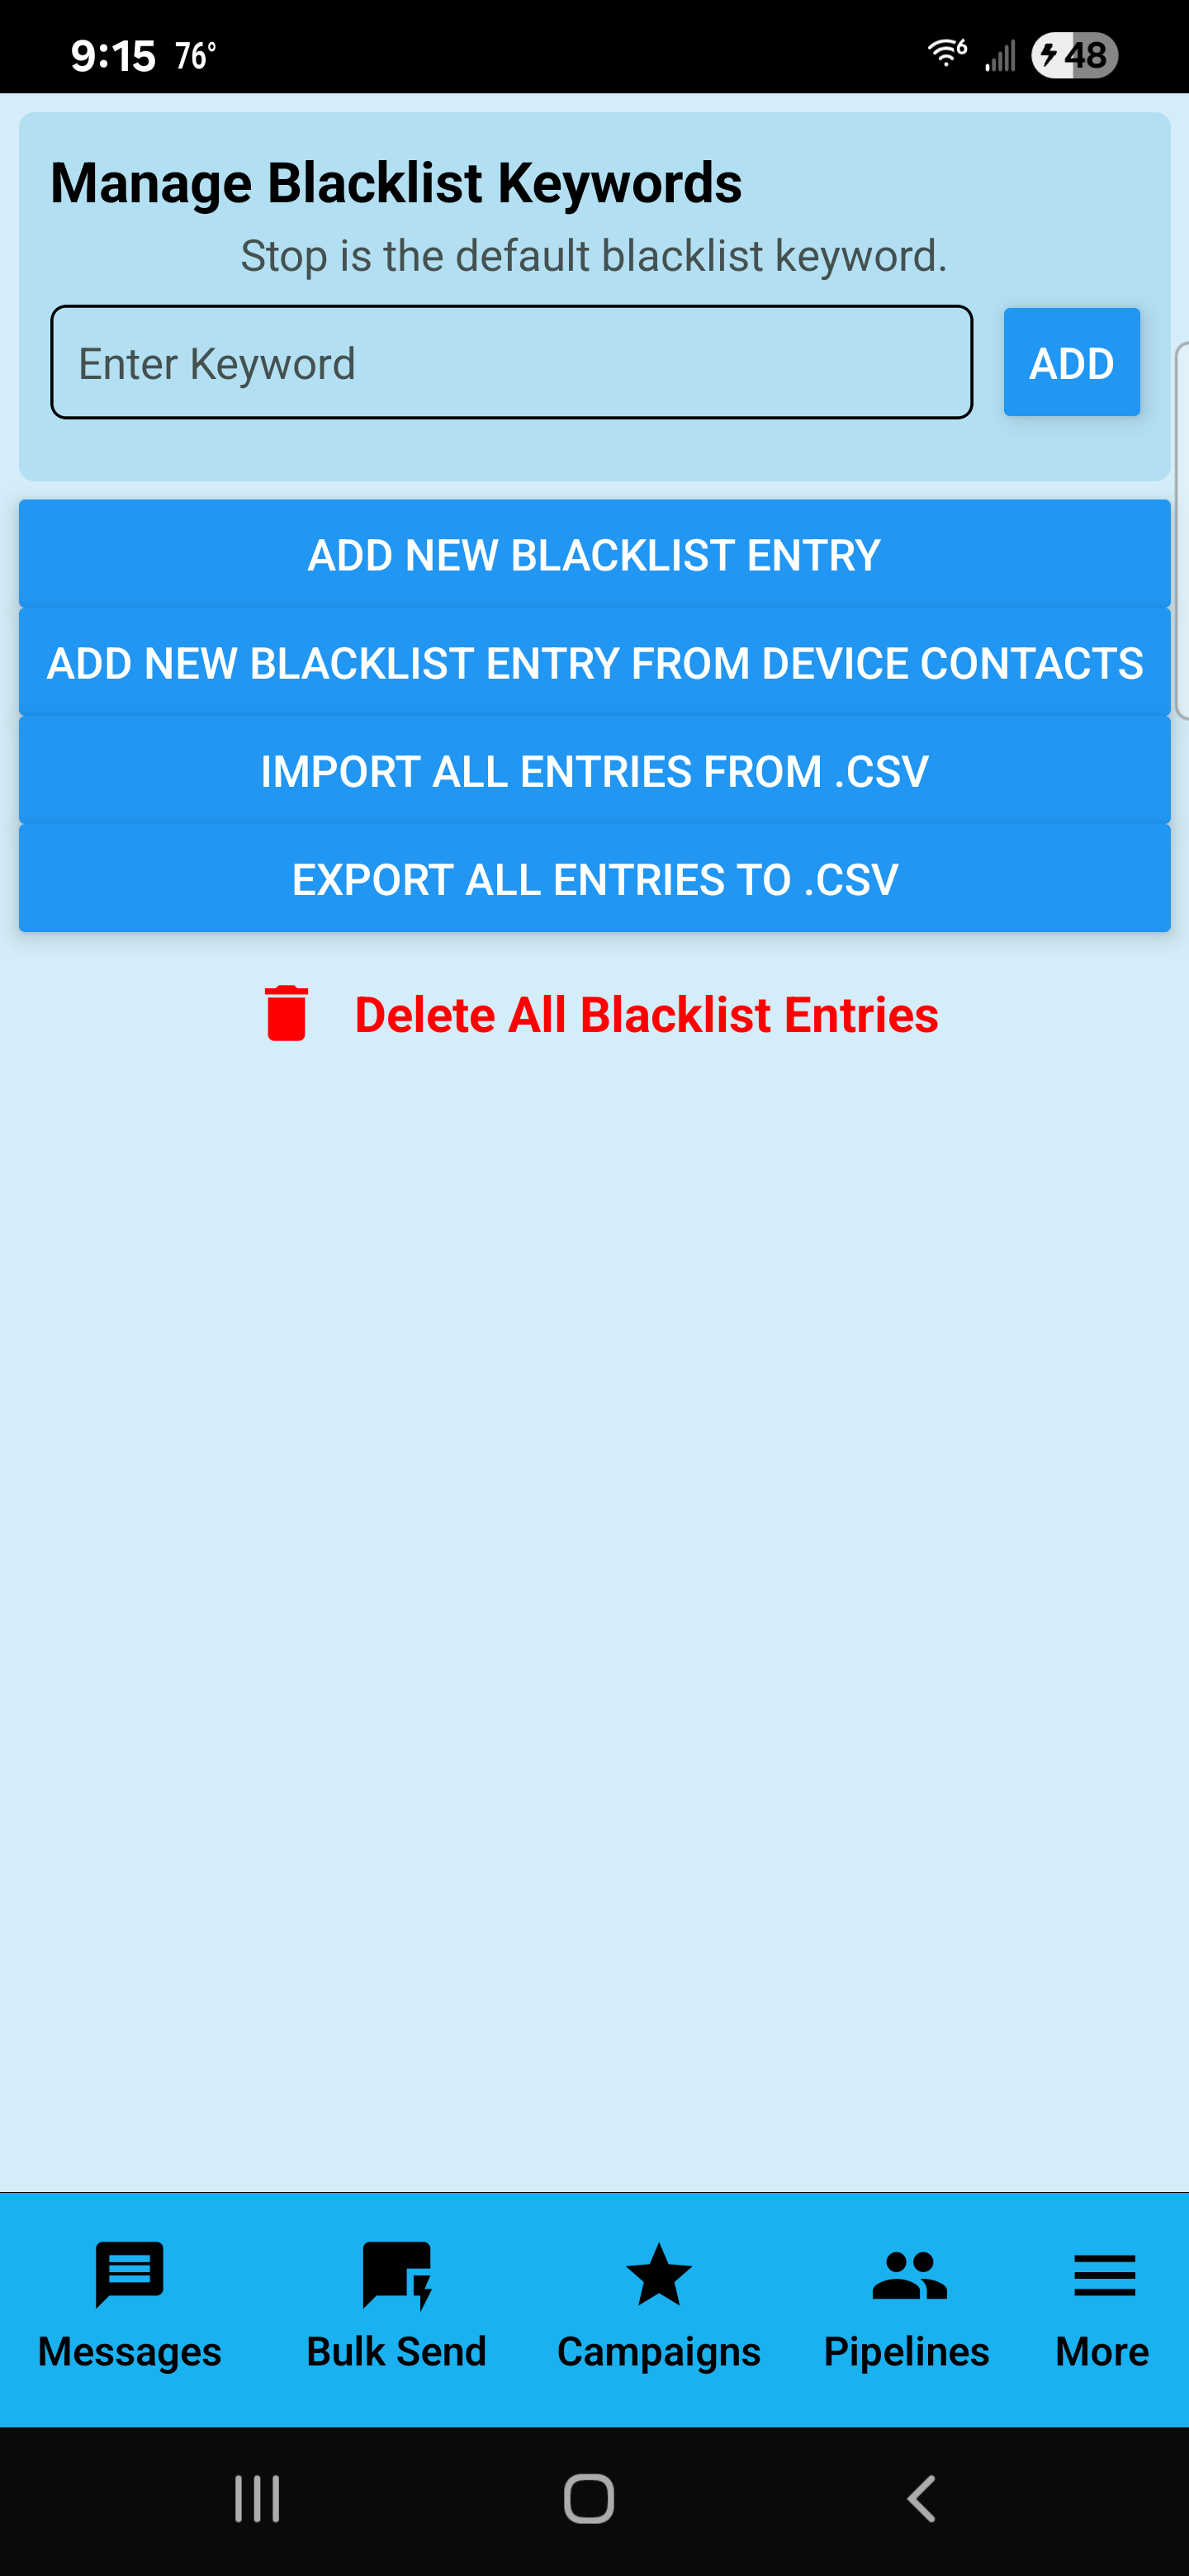
Blacklist
Blacklist is where you manage opt-out keywords and blocked entries. The screen notes that Stop is the default blacklist keyword.
Add keywords
- Type a keyword into Enter Keyword.
- Tap ADD.
Import / Export
- IMPORT ALL ENTRIES FROM .CSV to restore or migrate your blacklist.
- EXPORT ALL ENTRIES TO .CSV to back it up.
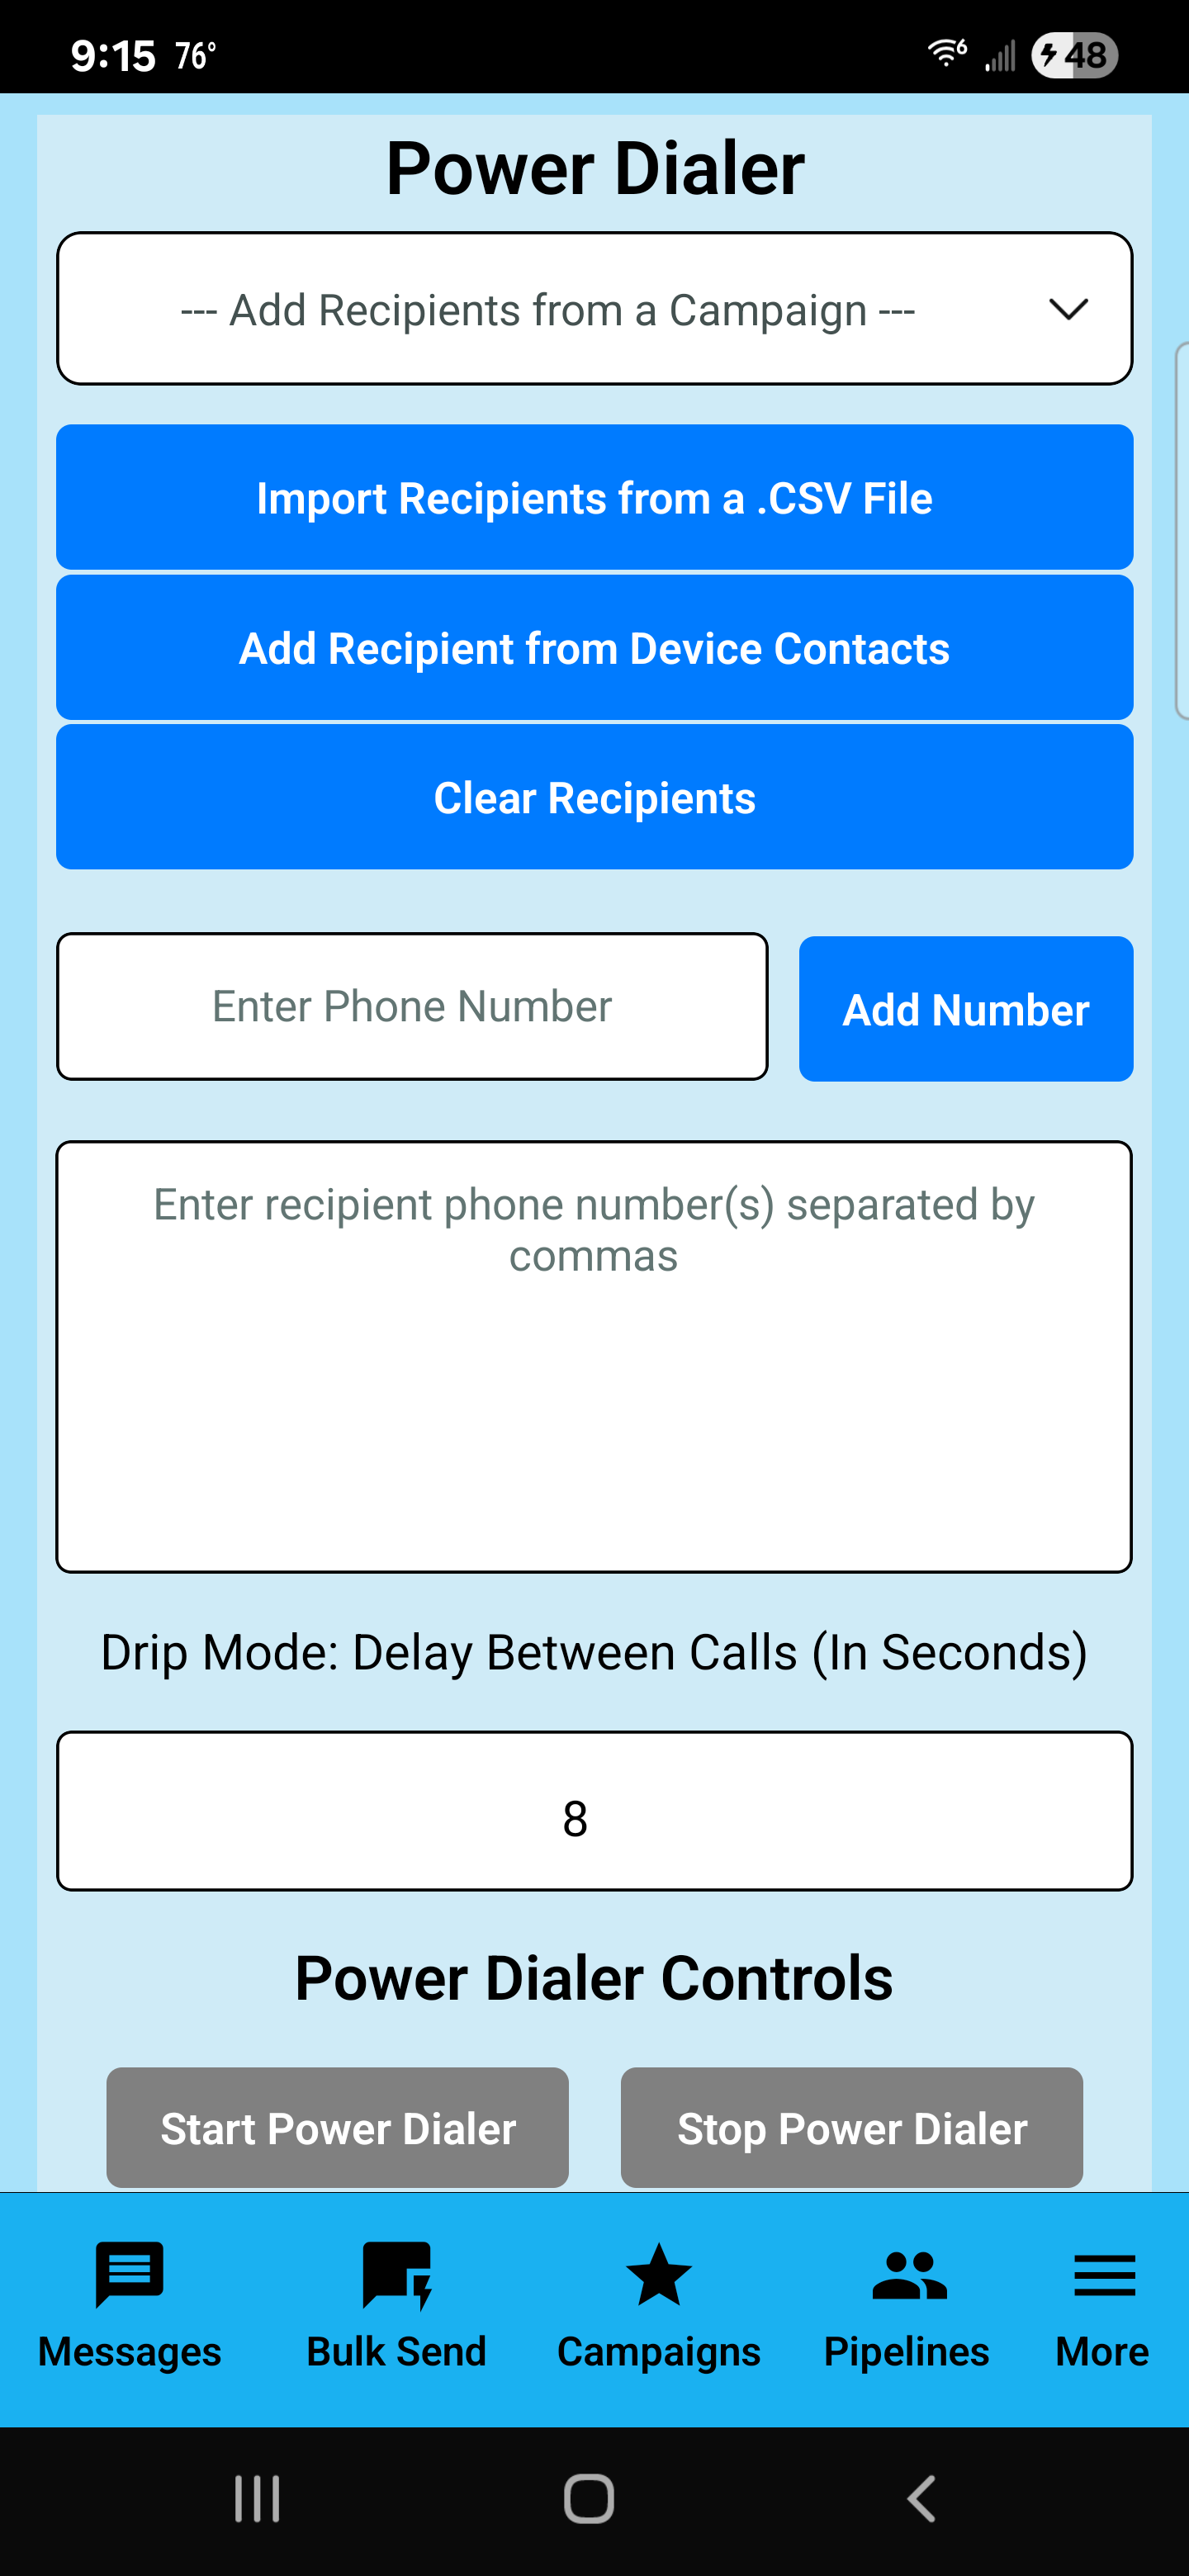
Power Dialer
Power Dialer is built for calling through a list of numbers with a controlled delay (“drip mode”) between calls.
Load recipients
- Select a campaign in the dropdown to load recipients.
- Or import from CSV / add from device contacts.
- Use Clear Recipients to reset.
Drip Mode
Set your Delay Between Calls (In Seconds) to control pacing.
Start / Stop
- Start Power Dialer begins calling through the list.
- Stop Power Dialer stops the sequence.
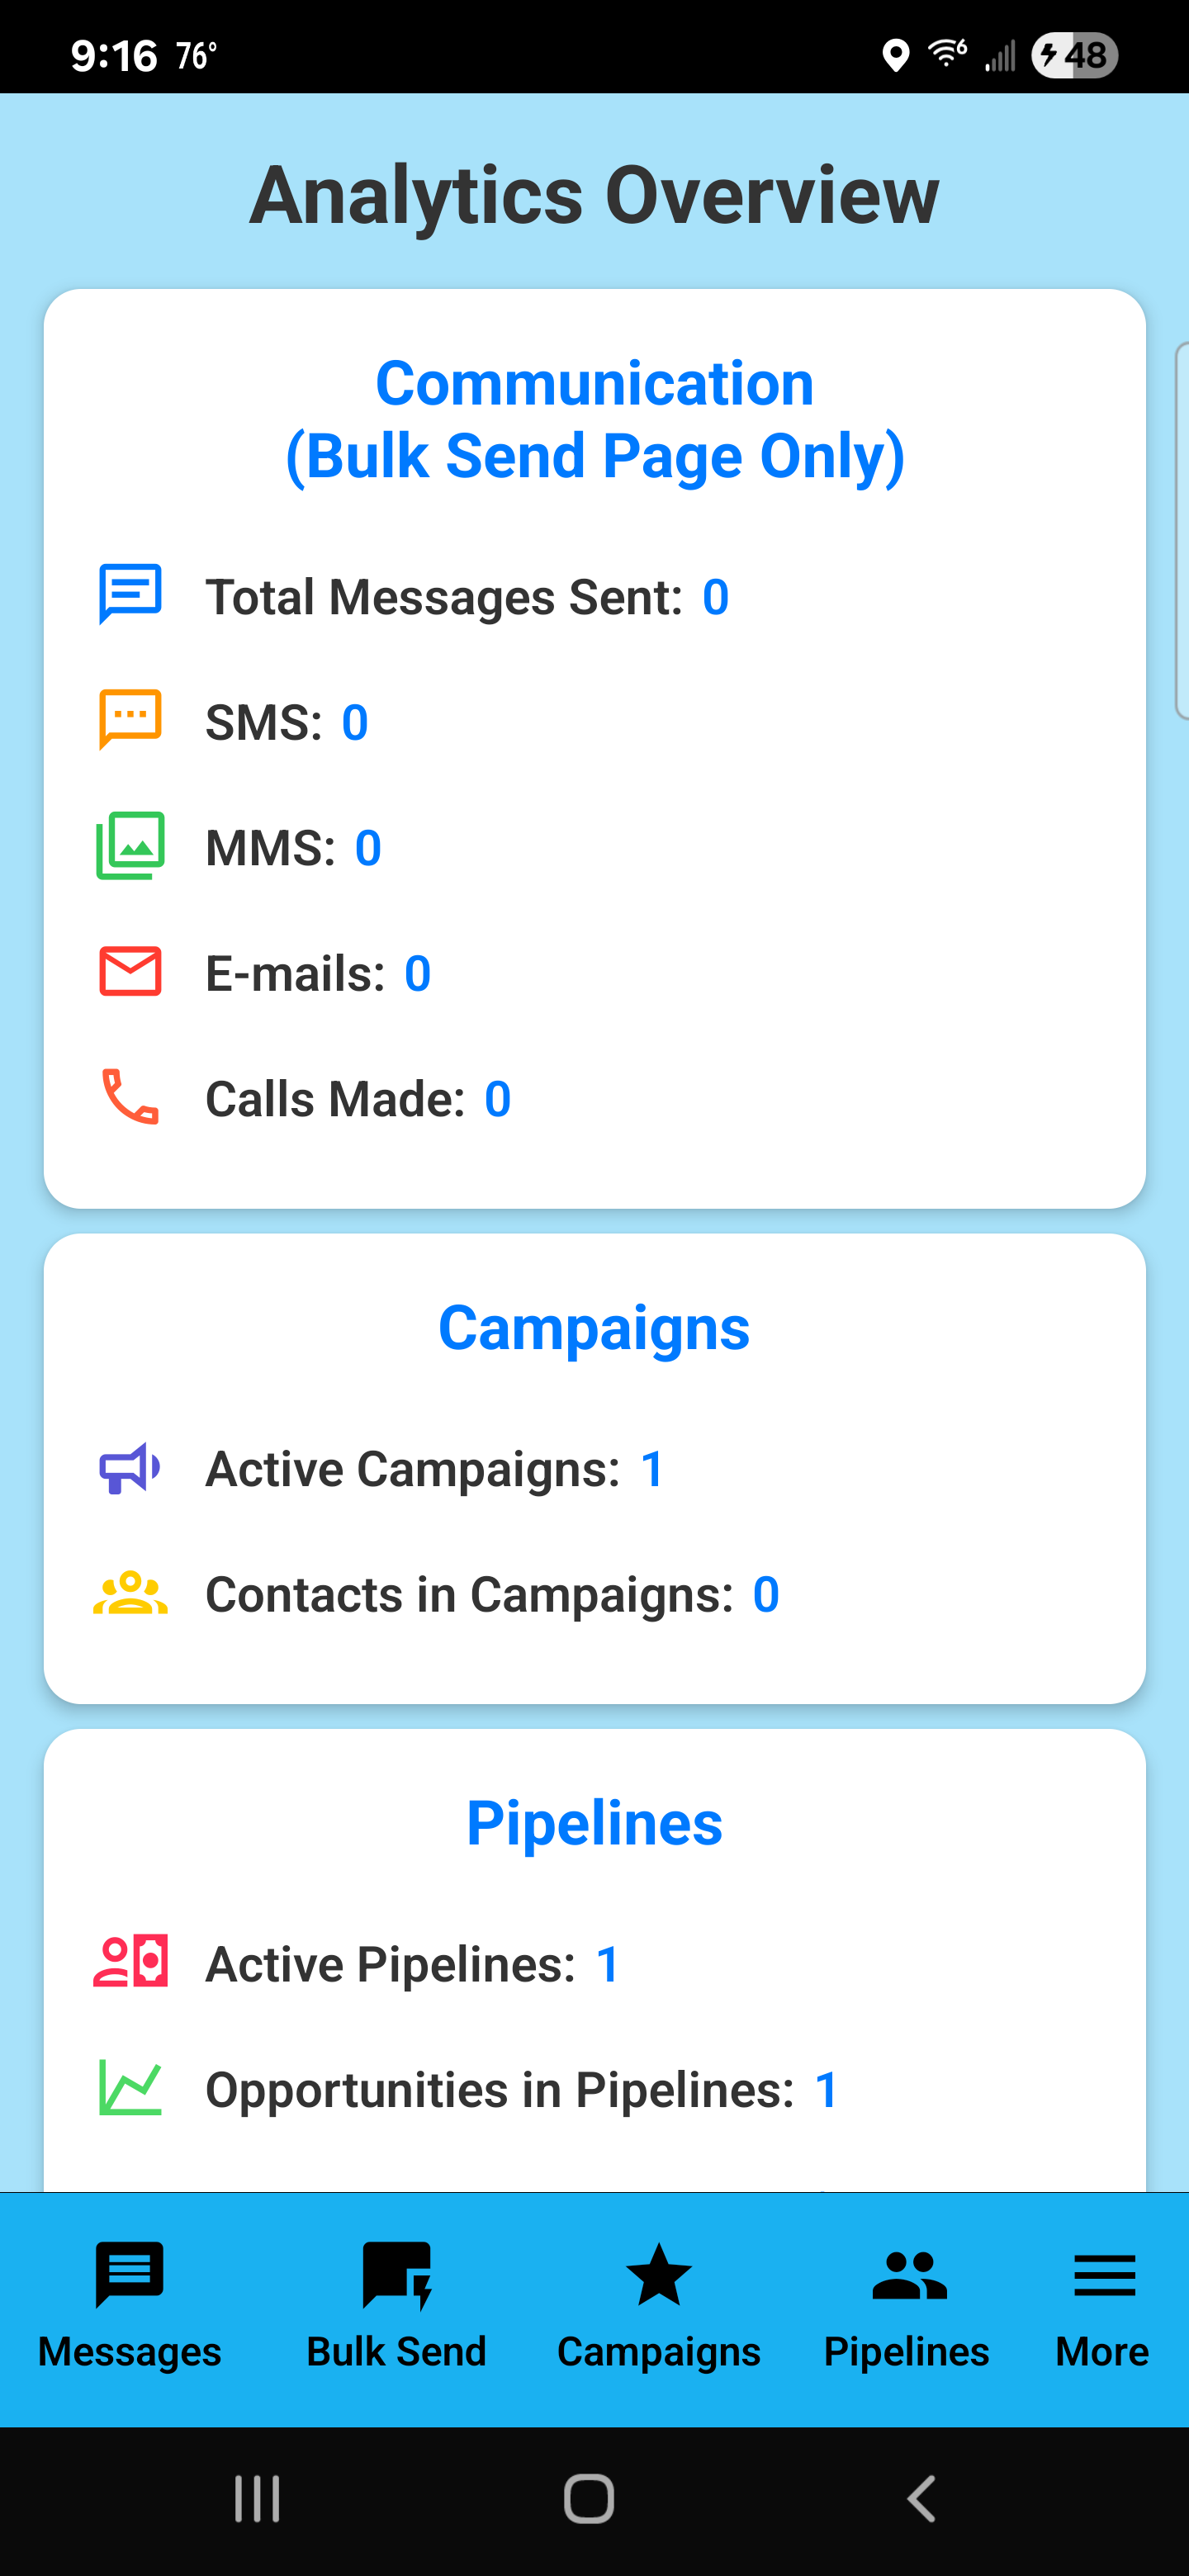
Analytics
Analytics gives you a snapshot of activity: messages sent, SMS/MMS counts, emails, calls, and totals for campaigns and pipelines.
Communication (Bulk Send Page Only)
- Total Messages Sent
- SMS / MMS
- E-mails
- Calls Made
Campaigns and Pipelines
- Active Campaigns and Contacts in Campaigns
- Active Pipelines and Opportunities in Pipelines
Message Templates
Message Templates let you save reusable messages so you can send consistent outreach quickly without re-typing the same content every time.
Create a new template
- Open More → Message Templates.
- Tap Add a New Message Template.
- Enter a short Title of Template (example: “Intro Pitch — Manufacturing”, “Follow-up #1”, “Pricing + Next Step”).
- Type the message in the large text area: Enter your message for this template here.
Use a template quickly (practical flow)
- Copy icon: Use this to copy a template message so you can paste it into Messages or Bulk Send.
- Share/Send icon: Use this to share the template text into another app/workflow (or into your sending flow, depending on your implementation).
- Trash icon: Deletes the template when you no longer need it.
Reorder templates
The up/down arrows let you move a template up or down so your most-used templates stay at the top. This matters when you have a long list of templates and want fast access.

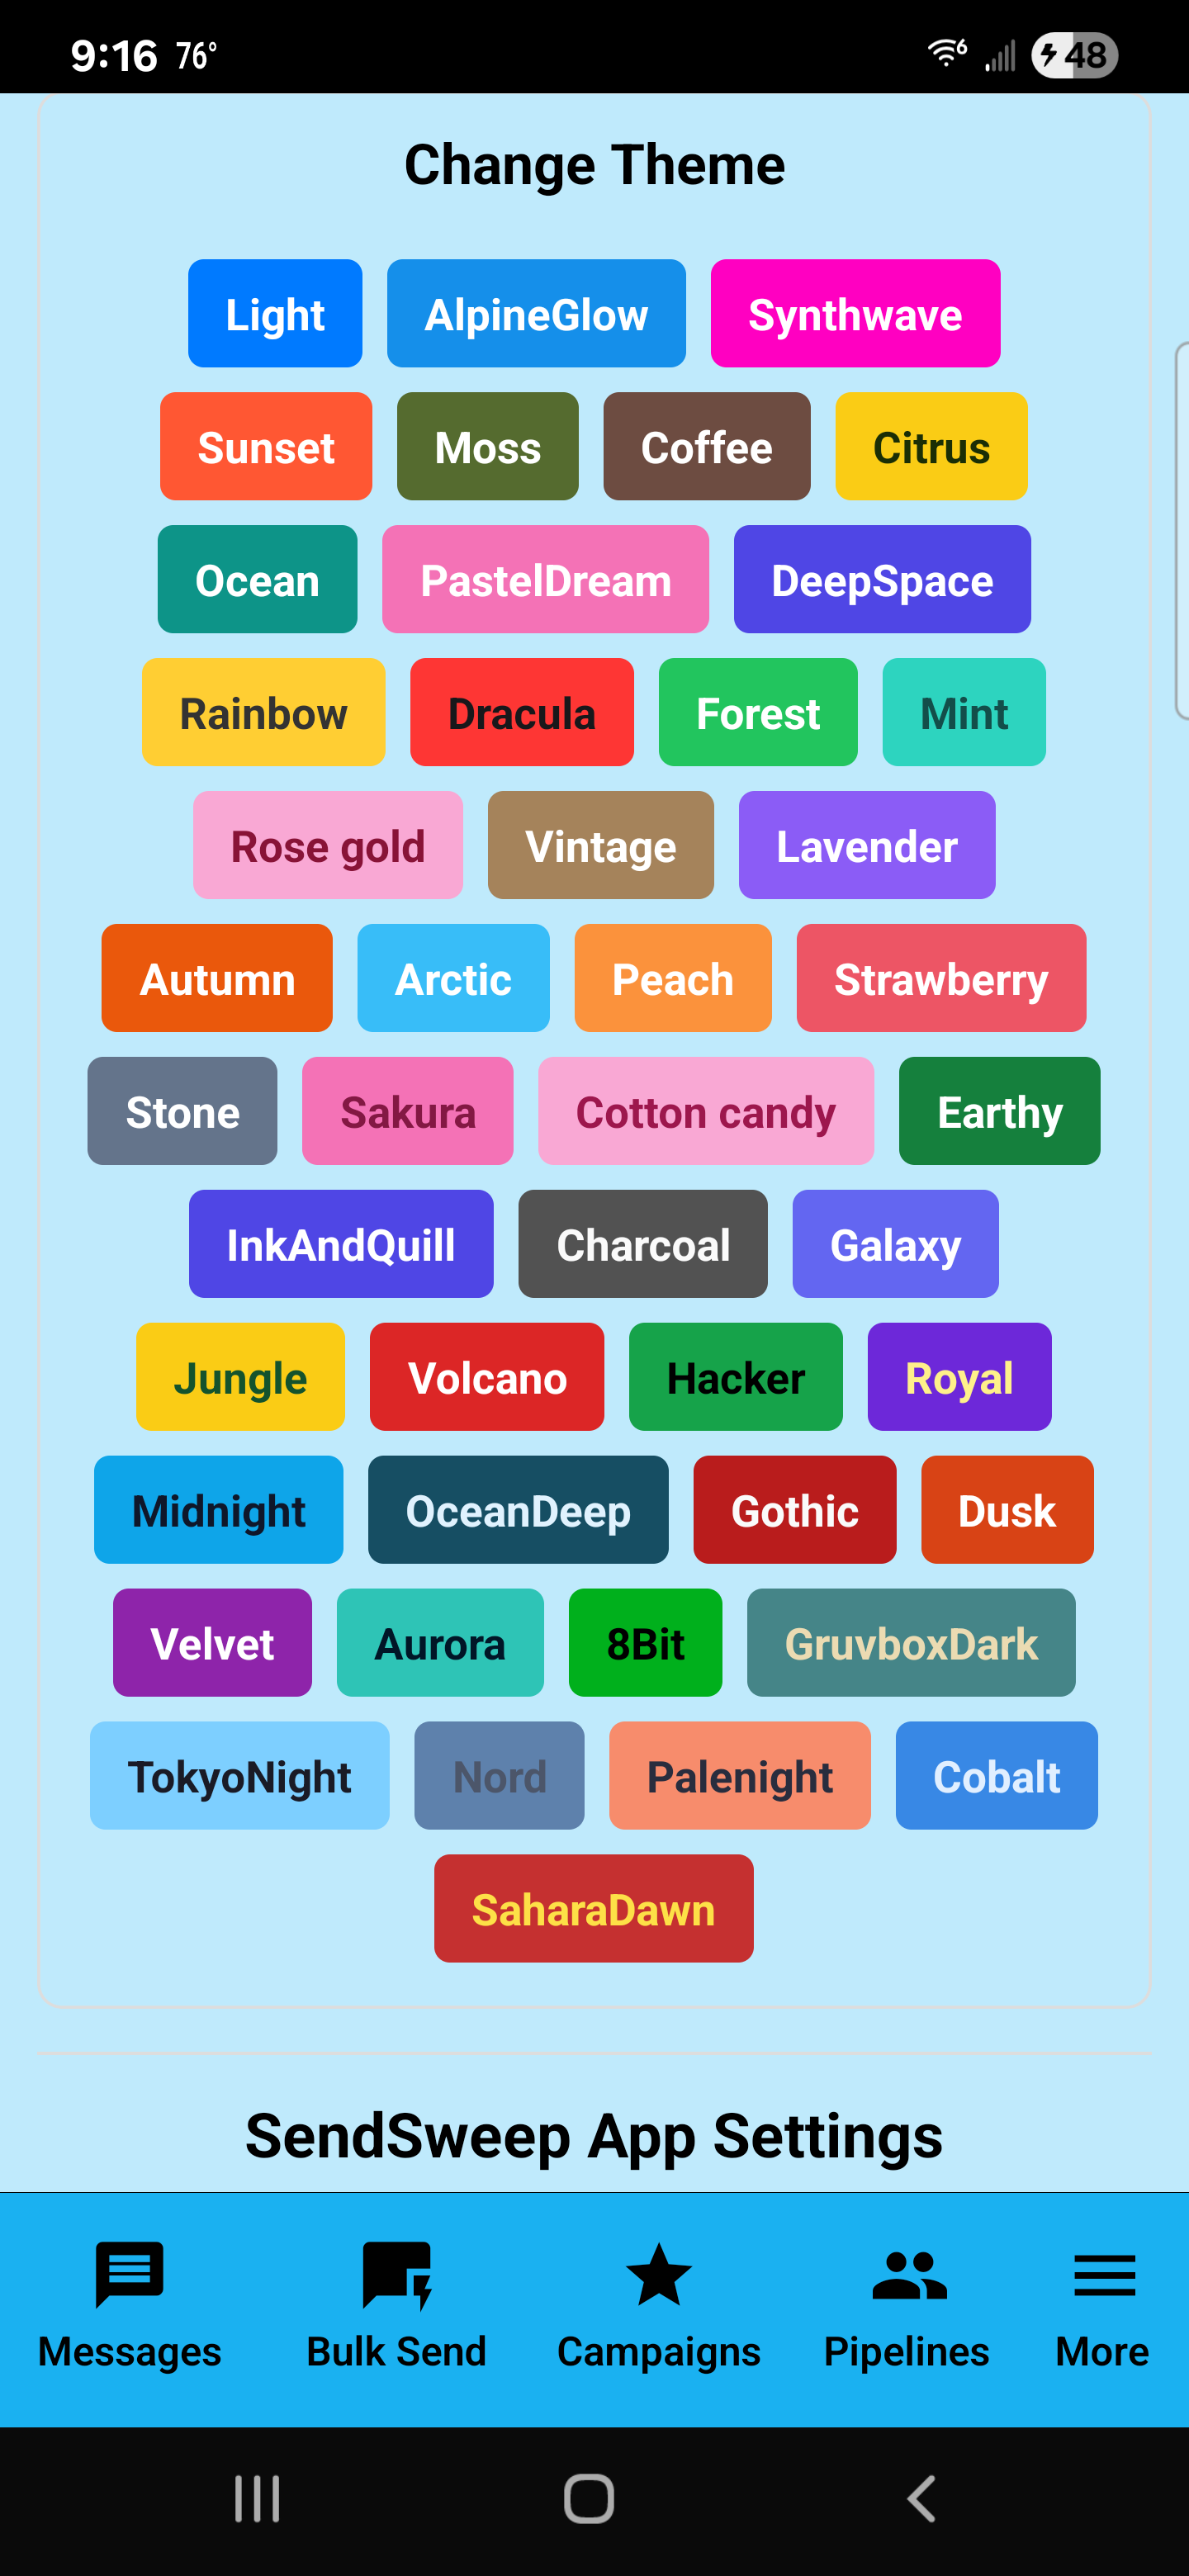
Settings & Theme
SendSweep includes a theme system so the app’s colors and style can match your preference. Themes are quick to switch and can make the UI easier on the eyes depending on lighting conditions.
Open the Theme settings
- Go to More → Settings.
- Find Change Theme.
- Tap a theme button to apply it immediately.
How theme selection works
- Each colored button is a named theme (example: Light, Synthwave, Ocean, Charcoal, etc.).
- Tapping a theme changes the overall look of the app (backgrounds, header colors, accent buttons).
- You can switch themes any time — it’s purely appearance and does not change your data.
Practical theme recommendations
- Bright environments: Lighter themes keep the UI crisp and readable.
- Night / low light: Darker themes reduce eye strain.
- Sales/outreach days: Pick a theme you can recognize instantly so you always know you’re in the correct app profile/workflow.